Elasticsearch learning
前言
学习了一遍Elasticsearch,做个demo巩固一下。

环境情况
- Rocky Linux 8
- Elasticsearch 8.6.1
- Logstash 8.6.2
- Enterprise-search 8.6.2
- MySQL 5.7
搭建Elasticsearch
官网下载安装包
1
2
3
4
# 下载
wget https://artifacts.elastic.co/downloads/elasticsearch/elasticsearch-8.6.1-linux-x86_64.tar.gz
# 解压
tar -zxvf elasticsearch-8.6.1-linux-x86_64.tar.gz添加用户和用户组
1
2
3
4
5
6
# 添加用户组
groupadd elasticsearch
# 添加用户
adduser elasticsearch
# 设置密码
passwd elasticsearch授权
1
2
3
# 移动到用户目录,并授权
mv elasticsearch-8.6.1 /home/elasticsearch/
chown -R elasticsearch:elasticsearch elasticsearch-8.6.1修改配置
1
2
3
4
5
6
# 打开配置文件
vi /home/elasticsearch/elasticsearch-8.6.1/config/elasticsearch.yml
# 修改内容
cluster.name: book-search
network.host: 0.0.0.0
http.host: 0.0.0.0启动
1
2
3
4
5
6
7
8
9
10
11
12
13
14
15
16
17
18
19
20
21
22
23
24
# 启动
./elasticsearch
#观察日志输出,找到初始化密码,方便后续修改
✅ Elasticsearch security features have been automatically configured!
✅ Authentication is enabled and cluster connections are encrypted.
ℹ️ Password for the elastic user (reset with `bin/elasticsearch-reset-password -u elastic`):
IUFw46*Ws5cLJ*lMi4y9
ℹ️ HTTP CA certificate SHA-256 fingerprint:
2e4531eebb1aa5d4d1c57948672f2fcb1b08bbdc748b757ee48d722483ca02d5
ℹ️ Configure Kibana to use this cluster:
• Run Kibana and click the configuration link in the terminal when Kibana starts.
• Copy the following enrollment token and paste it into Kibana in your browser (valid for the next 30 minutes):
eyJ2ZXIiOiI4LjYuMSIsImFkciI6WyIxOTIuMTY4LjU2LjExMjo5MjAwIl0sImZnciI6IjJlNDUzMWVlYmIxYWE1ZDRkMWM1Nzk0ODY3MmYyZmNiMWIwOGJiZGM3NDhiNzU3ZWU0OGQ3MjI0ODNjYTAyZDUiLCJrZXkiOiI1di13YzRZQmgtYVdzNDhpZGV6XzpERkF2empPVlQ3V0tTbXgwRHk3NE5nIn0=
ℹ️ Configure other nodes to join this cluster:
• On this node:
⁃ Create an enrollment token with `bin/elasticsearch-create-enrollment-token -s node`.
⁃ Uncomment the transport.host setting at the end of config/elasticsearch.yml.
⁃ Restart Elasticsearch.
• On other nodes:
⁃ Start Elasticsearch with `bin/elasticsearch --enrollment-token <token>`, using the enrollment token that you generated.其他
其他可根据自己环境的实际情况来配置和添加
测试
在浏览器输入Elasticsearch的地址查看信息
1
2
3
4
5
6
7
8
9
10
11
12
13
14
15
16
17
18
19
20
# 地址
https://192.168.56.112:9200/
# 结果
{
"name": "localhost.localdomain",
"cluster_name": "book-search",
"cluster_uuid": "Ms7sU-N1QpSE6y4ZBTQi0g",
"version": {
"number": "8.6.1",
"build_flavor": "default",
"build_type": "tar",
"build_hash": "180c9830da956993e59e2cd70eb32b5e383ea42c",
"build_date": "2023-01-24T21:35:11.506992272Z",
"build_snapshot": false,
"lucene_version": "9.4.2",
"minimum_wire_compatibility_version": "7.17.0",
"minimum_index_compatibility_version": "7.0.0"
},
"tagline": "You Know, for Search"
}
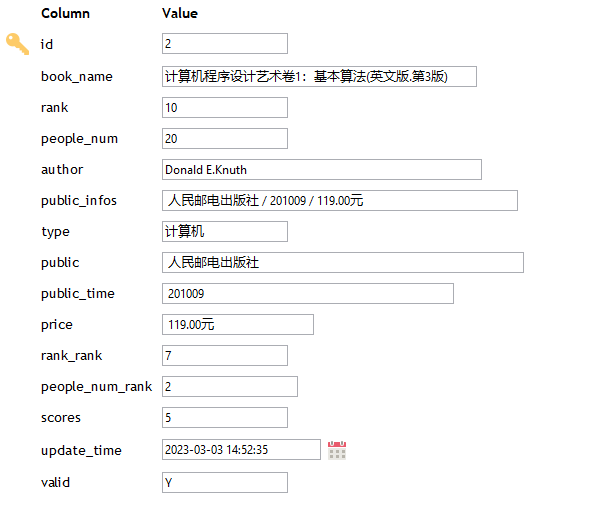
准备图书数据
从互联网中找到一份图书数据导入MySQL数据中
数据结构:
1 | CREATE TABLE `douban_book` ( |
示例数据:
MySQL数据同步到Elasticsearch
先创建索引
1
2
3
4
5
6
7
8
9
10
11
12
13
14
15
16
17
18
19
20
21
22
23
24
25
26
27
28
29
30
31
32
33
34
35
36
37
38
39
40
41
42
43
44
45
46
47# 创建索引
PUT "/idx_book?pretty"
# 更新索引索引mapping,当然也可以在创建索引的时候设置mapping
PUT "idx_book_test/_mapping"
{
"properties": {
"author": {
"type": "text"
},
"bookName": {
"type": "text"
},
"id": {
"type": "integer"
},
"peopleNum": {
"type": "integer"
},
"peopleNumRank": {
"type": "integer"
},
"price": {
"type": "text"
},
"public": {
"type": "text"
},
"publicInfos": {
"type": "text"
},
"publicTime": {
"type": "text"
},
"rank": {
"type": "double"
},
"rankRank": {
"type": "integer"
},
"scores": {
"type": "double"
},
"type": {
"type": "text"
}
}
}Logstash 安装-略
使用Logstash 同步MySQL数据到Elasticsearch
1
2
3
4
5
6
7
8
9
10
11
12
13
14
15
16
17
18
19
20
21
22
23
24
25
26
27
28
29
30
31
32
33
34
# 1. 把MySQL JDBC 驱动拷贝到服务器上
/home/elasticsearch/logstash-8.6.2/lib/mysql-connector-java-6.0.6.jar
# 2. 编写一个同步配置文件mysql-2-es.conf
input {
jdbc {
jdbc_driver_library => "/home/elasticsearch/logstash-8.6.2/lib/mysql-connector-java-6.0.6.jar"
jdbc_driver_class => "com.mysql.cj.jdbc.Driver"
jdbc_connection_string => "jdbc:mysql://192.168.56.1:3306/base?useUnicode=true&characterEncoding=UTF-8&serverTimezone=Asia/Shanghai&useSSL=false"
jdbc_user => root
jdbc_password => "123456"
use_column_value => true
tracking_column => "update_time"
tracking_column_type => "numeric"
record_last_run => true
last_run_metadata_path => "jdbc-position.txt"
statement => "SELECT * FROM douban_book where update_time >:sql_last_value;"
schedule => " * 0/10 * * * *"
}
}
output {
elasticsearch {
document_id => "%{id}"
document_type => "_doc"
index => "idx_book_test"
hosts => ["https://127.0.0.1:9200"]
cacert => "/home/elasticsearch/elasticsearch-8.6.1/config/certs/http_ca.crt"
user => "elastic"
password => "IUFw46*Ws5cLJ*lMi4y9"
}
stdout{
codec => rubydebug
}
}启动
1
./logstash -f /home/elasticsearch/logstash-8.6.2/config/mysql-2-es.conf
可以通过API或者ES工具查询索引数据
1
GET idx_book_test/_search
总结
关于数据同步有几种方案
- 如果业务数量小,可以直接用代码写同步逻辑
- 中小规模的情况下,可以使用Logstash 等数据同步工具
- 再大的数据规模就用读取MySQL binlog 日志文件的方式了
开发图书检索页面
页面开发基于enterprise-search和search-ui开发的
下载enterprise-search安装配置
1
wget https://artifacts.elastic.co/downloads/enterprise-search/enterprise-search-8.6.2.tar.gz
安装配置enterprise-search
1
2
3
4
5
6
7
8
9
10
11
12
13
14
15
16
17
18
19
20
21
# 1. java 环境变量配置
vi .bashrc
# 添加
export JAVA_HOME=/home/elasticsearch/enterprise-search-8.6.2/jdk-11.0.16.1
export PATH=$JAVA_HOME/bin:$PATH
export CLASSPATH=.:$JAVA_HOME/lib/dt.jar:$JAVA_HOME/lib/tools.jar
# 重新加载
source .bashrc
#2. 配置/home/elasticsearch/enterprise-search-8.6.2/config/enterprise-search.yml
secret_management.encryption_keys: ['6dd517534da70c63094dcde920585fb1a8a1b2bc9b96e93bbc7a553efaad0b78']
allow_es_settings_modification: true
elasticsearch.host: https://127.0.0.1:9200
elasticsearch.username: elastic
elasticsearch.password: IUFw46*Ws5cLJ*lMi4y9
elasticsearch.ssl.enabled: true
elasticsearch.ssl.certificate_authority: /home/elasticsearch/elasticsearch-8.6.1/config/certs/http_ca.crt
kibana.host: http://192.168.56.112:5601
ent_search.listen_host: 0.0.0.0
ent_search.external_url: http://192.168.56.112:3002启动
1
2
3
4
5
/home/elasticsearch/enterprise-search-8.6.2/bin/enterprise-search
# 第一次启动会生成用户名和密码,请记录
*** Default user credentials have been setup. These are only printed once, so please ensure they are recorded. ***
username: enterprise_search
password: c99czde429sxvx5m访问
http://192.168.56.112:5601在菜单
Enterprise Search-App search就可以配置对应的索引库为检索页面开发做准备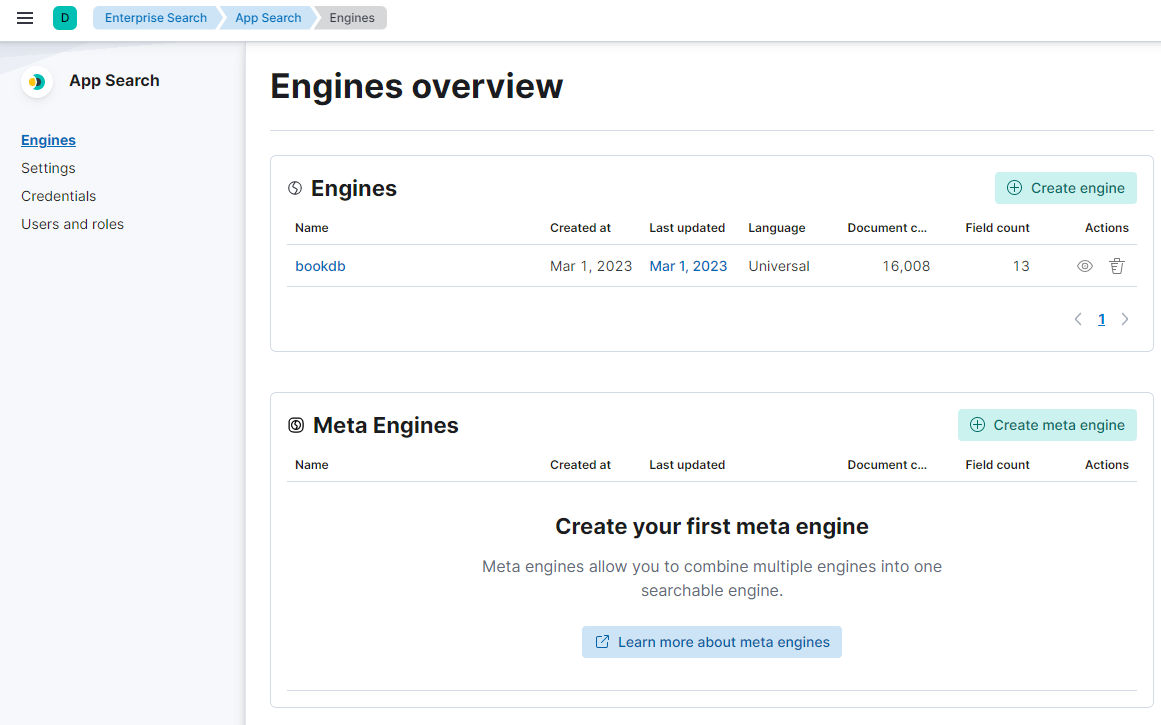
创建
bookdb,然后配置search UI,配置好点击Generate search experience可以预览效果和下载前端UI包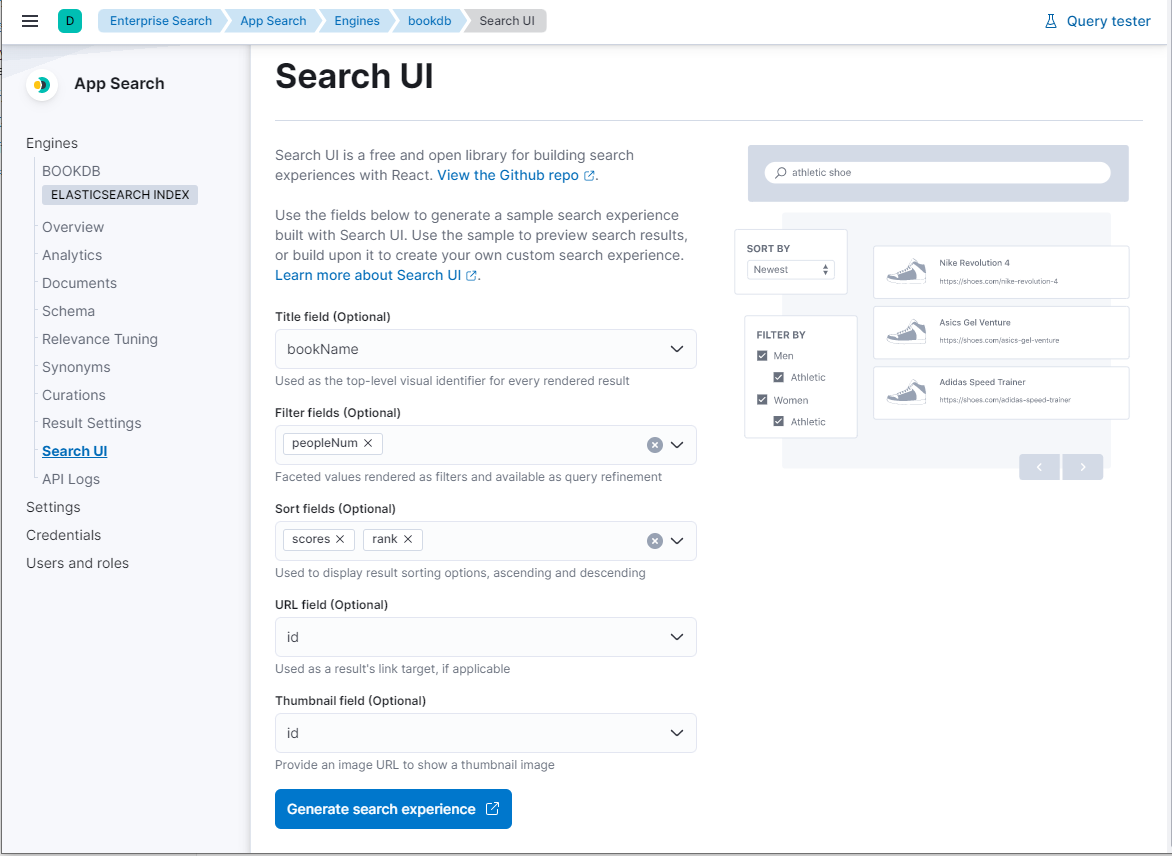
官方默认前端UI是用react开发,同时官方也提供了VUE前端UI的例子,比较熟悉VUE所以下载VUE的例子
1
2
# 1.下载该代码
https://github.com/elastic/search-ui/tree/main/examples/vueVUE Search UI 代码的安装和配置
代码是运行需要Nodejs环境,所以需要安排Nodejs环境,然后按文档进行构建和配置即可
关键点:searchConfig.js文件中的以下代码
1
2
3
4
5
6
// searchKey可以在生成的UI包中获取
const connector = new AppSearchAPIConnector({
searchKey: "search-sdnj9fcxy7yp7xpmv5qqc43q",
engineName: "bookdb",
endpointBase: "http://192.168.56.112:3002"
});其他代码根据自己的业务进行对应修改
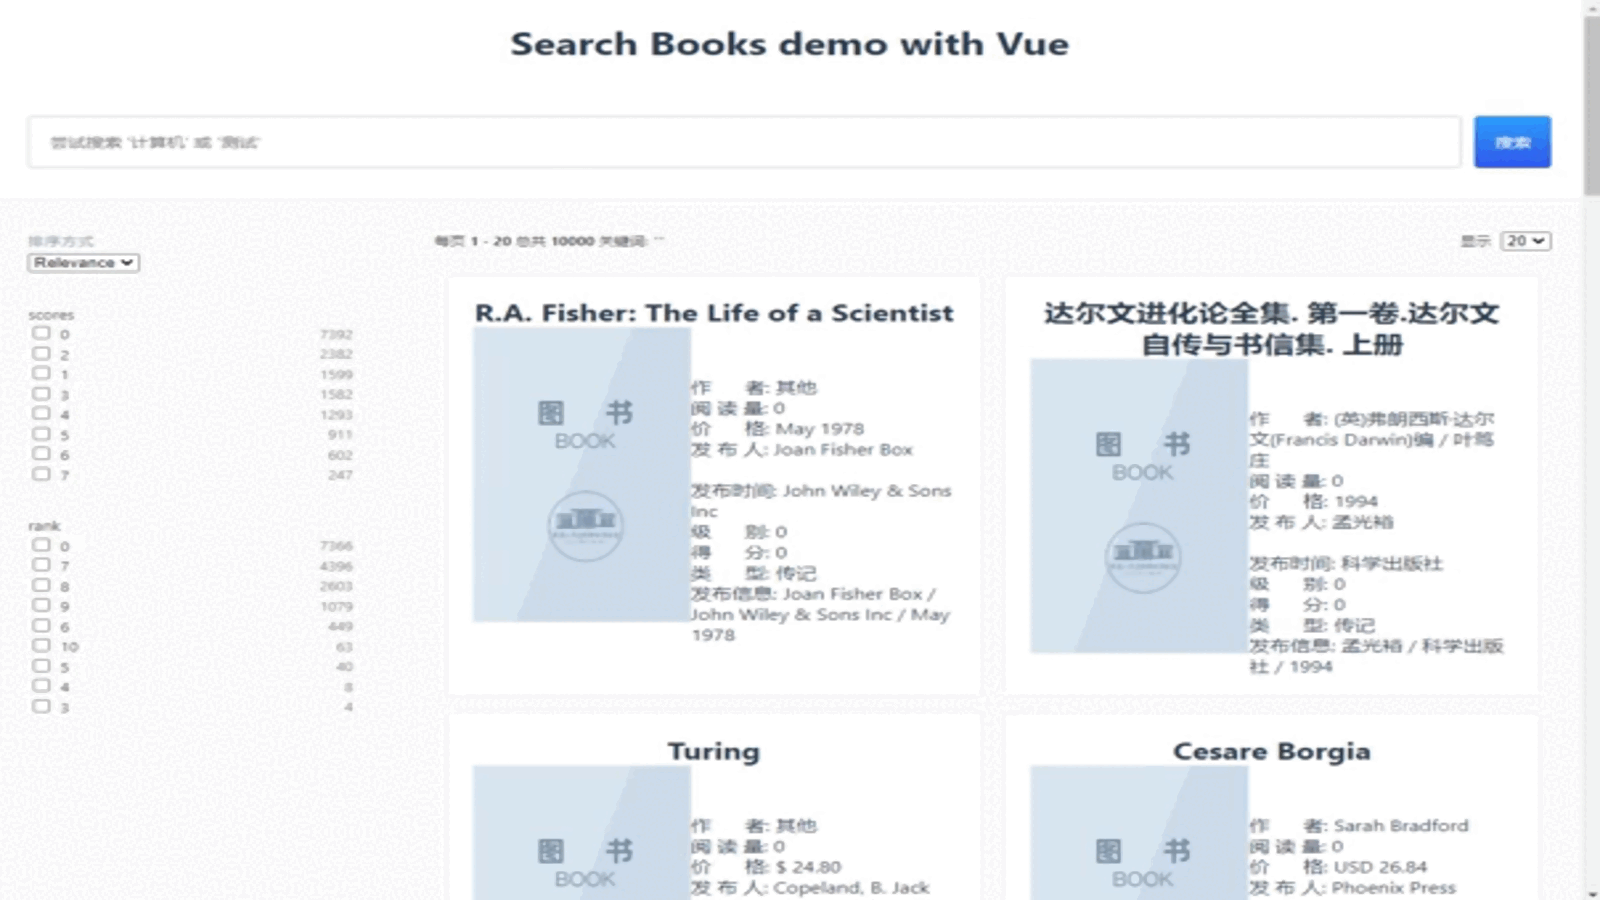
效果图
结语
流水式的记录的开发一个搜索功能的过程,这只是个demo,还有很多需要完善的地方,比如服务启动,怎么也得是后台启动;索引现在也没有做分词,也没考虑同义词等等。架子已经搭好了,后续慢慢完善。过程中用到kibana,我并没有单写出来,这个是需要注意的。官网推荐用kibana做为开发工具,我觉得有点重就没用,我用的是一个浏览器插件。